Wednesday, August 19, 2015

M-Touch Control

The newest console device for the Martin M-Series line of control consoles is now available, and it is really cool!  The M-Touch is a unique control surface that can be used for both playback and programming when combined with M-PC software or any M-Series console.

The surface of the low-cost controller has new-to-lighting technology utilizing Force Sensitive Resistors (FSR) on both flash keys and faders.  This allows surprising control possibilities based upon velocity and pressure.  In addition there are other touch sensitive keys and even a 5-pin XLR for DMX output.  You really should get your hands on an M-Touch as it is quite a powerful tool when combined with M-Series software.

One of the great features is that the M-Touch can be used with M-PC or used as a wing to any M-Series console.  In fact, you can even connect multiple M-Touch devices into any single system.


In order to do so, you will need to do a bit of configuration.  In the M-Series Menu, click on System then DMX Settings.


Now at the bottom of the screen select the USB2DMX tab and now you will see the M-Touch device (assuming you plugged it into your console/PC) on the top left of the screen.

On the right side of the screen are some options and here you can set the DMX universe to output from the 5-pin XLR (universe 1-4).  You can also set the Wing ID.  If the ID is set to 0 (the default) then it will mimic the first 10 faders on your desk.  If you set it to a higher number, then it will behave as a separate wing from the faders on your desk.  You can now change banks on the M-Touch and console separately!

The M-Touch is an amazing control option and very reasonably priced too.  Check out the videos below for more information and stay tuned for another blog post with some advanced functions of the M-Touch.
https://youtu.be/wLW7ID7zqu8

https://youtu.be/VN0F9beNTtU

Thursday, August 6, 2015

MAC Viper Quadray is Really Cool!

Martin engineers created a really cool accessory that replaces the front lens of any MAC Viper AirFX called the Quadray.  This nifty tool has four lenses that can each alter their positon allowing for really exciting and dynamic aerial beam looks.

Yes, you will loose a small amount of light output as you are now directing the output through four small lenses instead of one large lens, but the return you get in looks is amazing.  You can project 1, 2, 3, or 4 individually controlled beams of light from a single fixture.  Plus you can change between these looks at any time via simple DMX controls!


The Quadray is excellent for upstage fixtures placed on the deck or hanging in the air.  For instance, if you had 12 MAC Viper AirFX on the upstage floor behind a band you could create an plethora of different looks when the Quadray units are attached.  Sometimes you could have 12 beams behind the band, while at other times it could multiply to 24, 36 or even 48!  This is really one way to make HUGE looks with any rig.


Each of the four individual lenses can be positioned independently or they can come together to create a "normal" output of one image from the fixture.  Gobos can be projected as one image or multiples as well.  Martin also includes built in effects that provide a multitude of pre-programmed movement effects for the Quadray unit. From static fan outs to complex movement chases, they have thought of the most common and unique looks you would want.


Installation is very easy and the fixture auto-senses the new lens.  You will need to enter some calibration information about the Quadray unit into the fixture's menu though.  Plus do not forget that you will need a different fixture library in your console than the standard MAC Viper AirFX library to control the Quadray.


While the Quadray may not be for everyone or every application, it certainly can add some unique movement and excitement to many productions, while increasing the output capabilities of each fixture.  Check out this video for a bit more information and to see some shots of Quadray in action:

https://youtu.be/efiu0dCItU8

Friday, July 17, 2015

Speeding Up Martin RUSH Beams


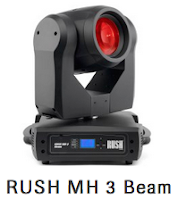
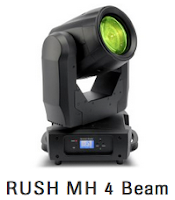
The Martin RUSH MH3 Beam and MH4 Beam luminaires are powerful beam moving heads capable of producing an intense and narrow long-throw beam for spectacular mid-air looks and effects.  These types of looks are very popular on many stages and the Martin Rush fixtures are a perfect choice for any production.

When designing and programming with multiple beams in the air, sometimes it is desirable to have the fixtures move extremely fast.  While both the MH4 and MH3 units are very fast at changing pan/tilt values, you can actually make them move even faster when desired!

In the control channel of the fixture you will find a setting to change from the default movement speed to a faster movement speed.  When activated, the fixture will move much quicker than before.  If you are planning any slow movements, you may want to revert back to the normal or slow setting to avoid any steppiness.  Because the pan/tilt speed is an option in the control channel, you can easily toggle this as needed in your programming.

http://www.martin.com/en-US/Product-Details/RUSH-MH-3-Beam

In the RUSH MH3 Beam, set the control channel (6) to the following DMX values:
DMX 50-59  Pan/Tilt Fast
DMX 60-69  Pan/Tilt Normal


http://www.martin.com/en-US/Product-Details/RUSH-MH-4-Beam
 
In the RUSH MH4 Beam, set the control channel (13) to the following DMX values:
DMX 80-84  Pan/Tilt Normal
DMX 85-89  Pan/Tilt Fast
DMX 90-94  Pan/Tilt Slow 
Note that with the MH4 Beam that the fixture defaults to the fast setting.  Also it has a slow setting that is useful if you need extremely slow and smooth moves (greater than 1 minute from position to position).


Remember also that you need to ensure that your console's fixture library allows access to these control channel settings.  If you can not find these options, contact your console manufacturer for an updated fixture library.

Thursday, July 2, 2015

M-Series Pro Tip: Create a Fanning Button


Fanning of parameters, effects, and time is a very powerful feature and the M-Series has a wonderful amount of tools to assist with fanning.  Be sure to read the M-Series User Manual for a full description of what is available.

I recently learned of a cool undocumented trick for fast access to fanning.  While the standard fanning abilities using the LCD/mini-touchscreen options are useful, I prefer a physical button that I can simply hold down while I adjust an attribute to create a basic fan.  This can be achieved easily by assigning the Fan function to an F-Key.

To set this up, first you will need to edit an F-Key.  Press and hold EDIT while also pressing the desired F-Key.  This will open the F-Key editor window.  On the top left, select "Command" then in the "Categories" column select "Channel Visualization".


The center of the screen will now display several options and you will want to select the last one labeled "Fan".  Press "Apply" on the bottom of the screen to accept this change.

One-handed fanning is possible as well!


Now anytime that you want to fan parameters of a fixture, simply select some fixtures, press and hold your F-Key and turn the desired parameter encoder (or track belt) to fan the parameter.  This works great to create basic position fans.  


If you wish to be more advanced, you can open the fanning screen to further adjust or change your fan type.  Or to be really cool, you can assign many of these fanning functions to other F-Keys as well.

Have fun fanning and customizing your M-Series controller.

Friday, June 26, 2015

VDO Sceptron Creative Accessories

The first product in a brand new line of creative video products has just been released by Martin Professional.  The VDO Sceptron family of products are a series of robust and water-proof LED video "sticks" designed for the rental market.  Each one is fully pixel-level calibrated to ensure perfect color and intensity matching.

The three versions are as follows:
10 mm pixel pitch (now shipping)
20 mm pixel pitch (shipping soon)
40 mm pixel pitch (shipping soon)

Each is available in 2 different lengths (1.05 foot/320mm or 3.28 feet/1000mm) and can be controlled either from the P3 System Controller or via DMX.  If you have not seen the VDO Sceptron products yet, contact your Martin dealer as they are really cool.

But there is much more to know.  There are many different accessories available for the Sceptron units.  First is a wide variety of diffusers available in either white or smoked.  The smoked (grey) diffusers are great when you want the units to "disappear" into the set when not in use.  There are different shapes available too.  The options are: Square (included), Flat, Round, and Tube.
Round Diffuser

Furthermore there are also two lens options: A Narrow Lens for 20 mm and 40 mm units and the Asymmetric lens that fits all models.  The Asymmetric lens is great for washing a wall or part of a set and it allows the unit to be placed very close to the illuminated surface.

The VDO Sceptron units also have a range of attachment devices to allow for quick installation of creative setups.  First is the Sliding Bracket that allows addition of a clamp or half-coupler at any position within the unit.  In addition, a Linear Coupler allows fixtures to be easily linked end-to-end while the Parallel Spacer allows the units to be hung parallel to each other.  Two different models easily adjust between three spacing options: 30/40/50 mm or 60/70/80 mm.


Additionally a specialized VDO Sceptron Accessory & Test Tool is available to assist with two important functions.  On one end it has an embedded magnet that is used to activate an internal "test button" on the VDO Sceptron units.  The other end it has a point on the front to assist in removing diffusers or lenses.

Many exciting stage designs and looks can be created with the new VDO Sceptron products.  With unparalleled brightness, calibration, easy of installation, and the power of the P3 System Controller the VDO Sceptron units are the perfect choice for any production. 

Check out this video featuring Wouter Verlinden, Product Manager LED Video, as he further explains the products and possibilities:
https://youtu.be/ERCRRFASA64


Thursday, June 18, 2015

New Accessories for MAC Quantum Wash

You may not have known this, but Martin has a special lens available for the MAC Quantum Wash luminaire.


The Soft Lens Accessory (P/N# 91611600) easily attaches to the front of the unit and adds a softening lens and small snoot to the light.  This is great for theatrical or other uses where a even softer than normal wash is desired.


In addition, City Theatrical is now offering two custom accessories for the MAC Quantum Wash luminaire.  Both are also specialized front lenses designed to eliminate the stray light coming from the lens in narrow zoom and also give a more discrete look as they hide the lens itself from audience view.


The first is the Hexcel Louver (City Theatrical P/N: 2794) and the second is a Concentric Ring (City Theatrical P/N: 2795).  Both units are currently in stock and shipping from City Theatrical.

Wednesday, June 10, 2015

Mac Viper Pan/Tilt Speed Settings

Did you know that you can assign the default movement abilities of the Mac Viper products by making a change in the menu system or via DMX?  There are three options: Normal, Fast, and Slow.

The Normal setting is the default and the one that most people will use as it works well for most shows with combinations of fast and slow moves.  However, there may be specific cues or sequences where you choose to change the pan/tilt speed.  The Slow setting is optimized for smooth movement and is best when performing slow movements at a long throw.  The Fast setting is optimized for speed and is handy when building fast chases and ballyhoos.

Using the control channel, you can change the pan/tilt speed setting as needed, just remember to restore it back after the required instance.  Otherwise you might find subsequent cues reacting differently.  Also note that the pan/tilt speed will revert back to the Normal speed setting after a power cycle (when changed via DMX).  To lock the pan/tilt speed to a particular setting, make the change directly in the Speed section of the fixture menu instead of via DMX.

 It is also a good idea to confirm that all your fixtures are set to the same pan/tilt speed setting before starting a programming session.  Otherwise you might find some fixtures moving differently from others!


To make pan/tilt speed changes via DMX use the following values on the control channel.  Note that the value needs to be held for 1 second for the change to take affect.

DMX 80-84 - Normal pan/tilt speed
DMX 85-89 - Fast pan/tilt speed
DMX 90-94 - Slow pan/tilt speed

Have fun with the settings and experiment with how you can optimize your Vipers for whatever movement task you give them!