Thursday, January 28, 2016

M-Series Q-Blender Feature

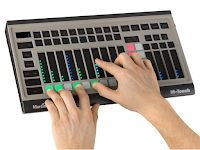
The Martin M-Series lighting controller range has a really cool and unique software feature called Q-Blender.  This function allows you to stack cues into a list and then instantly spread these different looks across a fader.  This gives you the ability to manually crossfade between looks and create some exciting manual controls.  For instance, you could make a fader that simply moves some fixtures between pre-defined positions as you move the fader up and down.  Alternately you could adjust the color, speed of strobing, iris size, or much more.  I am sure that any programmer can come up with many instances where Q-Blender would be extremely valuable.

Q-Blender is a setting that can only be applied to an Override type of cuelist.  The best option is to first build and record your looks into a cuelist (set to Override).  It is important to remember that override cuelists do NOT use tracking and therefore you need to think about what parameters you are storing into every cue.  You can use the record option "Active & Inactive" to ensure that what you are seeing is being recorded.

Once you have stored your looks, press Options in the top left of the cuelist window.  You will see in the Advanced area the option to active the Q-Blender feature.  Once selected, close the Options window and you are ready to try out your cuelist. 

Looking at the cuelist window, you will see that there are two new columns labeled "From" and "To".  These show the range of the fader that will be assigned to each particular cue.  As you run the fader up and down, the data on stage will crossfade with your manual movement at the given ranges.

You can edit various attributes of the Q-Blender cuelist as well.  For instance, you can change the Fade Mode as well as the range for which each cue is active on the fader.  For instantce, the Fade mode can be changed to snap when you want something to instantly come on and then control subsequent changes with the fader.  By also adjusting the From/To designations of the fader you can have the first bit of the movement activate a look while the subsequent (and evenly distributed) ranges of the fader control all your other cues.

Q-Blender is a very unique and powerful feature of the Martin M-Series lighting controllers.  Programmers and designers will find many different uses for this tool.  For further details, consult the M-Series user manual and watch this video demonstration:
 https://youtu.be/tx4jznXS6e4

Wednesday, January 20, 2016

Beams, Beams, Beams!

Tight, narrow beams of light are a staple of lighting design and Martin Professional has several products that create stunning beams of light.  These units are very impressive when used in large quantities and can wow audiences and professionals alike.


The Martin RUSH MH3 Beam and RUSH MH4 Beam fixtures are designed for maximum beam effects.  Each can produce extremely narrow rays of light that seem to go on endlessly.  The RUSH MH3 Beam boasts a zoom range of 1° to 3.8° while the RUSH MH4 Beam has a powerful fixed beam angle of 3°.


Both units include a color wheel, gobo wheel, rotating prism, and dimmer.  Even though they are based on low wattage lamps, the small aperture and narrow lensing allows for an extremely bright output.  In fact, the collimated beam is so intense that you MUST be careful where you point them as it is very easy to burn things.

For even brighter and more feature rich beams, consider the Martin MAC Viper Beam.  This fixture is comprised of the MAC Viper AirFX with a special lens attached to the front of it.  The micro-fresnel lens is easy to install and produces amazing pencil-thin beams of light.  In fact, the unit has a zoom range of 7.5°-31°.  When combined with all the built in features of the MAC Viper AirFX you get an amazing beam fixture that can create a multitude of looks.  In addition you can use the internal iris to narrow the output down to near zero degrees!  Don't worry if you cant get your hands on the MAC Viper Beam, the MAC Viper AirFX on its own can also create some stunning beam effects with its native lens too.

Powerful narrow beams have been all the rage on many stages in recent years and are here to stay.  It is important to understand how to design and program with this type of fixture and to be aware of the dangers too.  Martin Professional has a broad range of products to help you create various types of narrow beams on your stage.

Monday, January 11, 2016

M-Series 2D Plan View Basics

Martin has recently released new software for the M-Series controllers that adds an exciting new feature called 2D Plan View.  In its simplest form, this new tool allows users to build custom graphical layouts of their lighting rig.  The 2D Plan View allows for quick fixture selections and also displays fixture output, color, and positional information.  While that is certainly wonderful, the capabilities allow for much more and the 2D Plan View can quickly become a primary workspace for any programmer.

 
The 2D Plan View includes functionality for background images, groups, objects, layers, and pages.  Once configured as desired, the feature essentially allows the programmer to create their own custom selection and visualization screens.

Building a plan is very simple.  First you need to add the 2D Plan window to one of your screens.  Then you can begin to work within the 2D Plan View.  One of the most important functions to
understand is the button in the top left corner of the window.  It toggles between Live and Edit.  As the names suggest, this button allows you to either use the window to select and visualize fixtures or to edit the layout and options of the 2D Plan.


Once you are in Edit mode, select your fixtures in any manner that you would normally select them (command line, groups, fixture center).  Then click on the Add button to open the Select Type to Add window.  
Here you can choose between adding fixtures, groups, or objects to your 2D plan.  When Fixtures is selected you are presented with several options as to how to add the fixtures (Add mode).  Options include individual fixtures, lines, curves, circles, or grids.  Make your choice and click on Place Fixture(s) to be returned to the 2D Plan.


Now click (or click and drag) to add your fixtures to the 2D Plan.  Note that if individual fixtures is selected as the add mode then with each subsequent click the next fixture of the selection will be added.  The example below shows clicking and dragging a selection of 12 fixtures with the line Add mode:

Within no time you will have a layout on your screen.  Now toggle back to Live.  As you begin programming or playing back data you will see this represented on the 2D Plan View.  You can also click on (or touch) individual fixtures to select them or click/touch and drag to select multiple fixtures.  This makes for a great way to grab fixtures during programming.

This is just a very basic explanation of how to get started with the 2D Plan View.  There are tons of things that can be created when you combine groups, objects, background images, pages, and layers to make quite a dynamic setup. 

Check the M-Series support pages for more specific details on the 2D Plan View features and also watch the video below for some cool examples of the possibilities.
https://youtu.be/8AnHolaQ_wg