Showing posts with label M-Series. Show all posts

Monday, June 5, 2017

Martin M-Series New View Management


Martin has recently released version 3.70 of the M-Series software which brings exciting new features to the console platform.  The development team has redesigned the views system in incredible ways that also opens the door to more new features coming soon.  Although existing views from previous software versions are not importable, that is a small price to pay for the powerful new system.

New tools allow for simple layout creations, configuring of monitors, storing of views, quick recalls and much more.
 
One of the key benefits of the new system is that all views now work and adjust across all consoles and M-PC!  This is a great tool that allows programmers to prep or edit on M-PC and then load their show into an M-Series console without having to change their views and screens.  Of course this works the other way around and between the various console models too.  Plus there are remarkable new tools for creating views and managing all your windows.


A new concept called Workspaces allows a quick toggle to change the behavior of the sidebar, views, and function keys.  This is useful for creating your own different "modes of operation" on a console or M-PC system.

Version 3.70 of M-Series software also includes many more changes and enhancements when working with views, windows, and screens.  It is essential to understand the relevant terminology:

Screen The actual monitor. This can be a single touch, multi touch or non touch screen. The position and resolution can be changed.
Sidebar A small strip on the left or right edge of a screen.
Toolbar A small bar shown at the top edge of a screen.
Layout Arrangement of docking spaces (3 columns, 4 boxes etc).
Window Contains the content (like presets, groups, clock, etc...).
View Arrangement of layouts and windows placed in them. With this you can change the content on one or multiple screens at once.
View directory A collection of all views within a show. A show has only one directory that is shared in a network environment.
Workspaces The screen sidebar show the content of one workspace. It is a mixture of views and function assignments.
Workspace Browser The user can switch workspaces to get another set of assignments in the screen sidebar. Workspaces can be added, copied, moved and deleted.

The following video explains all the changes and new features in detail.  Take the time to watch the video and try out the new features on your next M-Series show!  https://youtu.be/8nw1Fahp7eY

Thursday, September 1, 2016

Control a Universe for FREE with M-PC!

Martin M-Series systems have many great features that allow programmers to create exciting and dynamic lighting cues and shows.  One of the little-known functions is that M-PC enables one universe of output for FREE.  With no additional hardware or dongles, you can use M-PC to control lighting fixtures, media servers, and any DMX compatible device. 

The output is via Art-Net or sACN and will control anything that is patched to the first universe.  You simply have to connect the Ethernet from your computer to a node or Art-Net/sACN capable device.  There are no time restrictions or DMX interruptions, so anyone could use this in a show environment.  The only M-Series functions that are disabled are DMX IN and RDM capabilities.

In addition, with M-PC you can also access the FREE universe of DMX control via any ENTTEC capable USB to DMX device (USB DMX PRO, PRO MKII and OPEN USB DMX). With these units you can simply plug in the DMX line to the USB device and start programming.  Note that before you can use your ENTTEC device you will need to ensure its drivers are installed.  For details, see this page and scroll down to the "ENTTEC Devices" section.

 
M-PC is a full featured lighting control platform with total access to all the features of the M-Series control system.  Whether working with one universe or many, keyboard shortcuts can be extremely handy.  Here is a list of all the keyboard shortcuts that are compatible with M-PC.


To learn how easy it is to program M-Series on M-PC check out these tutorials:


Friday, April 8, 2016

M-Series Grouping Tools

Martin Professional's M-Series controllers have a host of powerful features for programming lighting.  While most consoles provide groups and simple fixture selection tools, the Grouping Tools window in the M-Series offers unprecedented abilities.  In short, the tool allows for the easy division of selected fixtures into various subsets; but it can do much more. It is very useful when creating fixture groups; plus when combined with the Next/Last buttons, rapid manipulation of selected fixtures becomes possible.


Before you can use the Grouping Tools, you must select the fixtures you wish to work with.  Then the various options in the Grouping Tools window become available.  The top right of the window will also indicate the quantity of fixtures in the current selection.  The rest of the Grouping Tools window can be split into two distinct parts: Mode and Actions.


The Mode section of the window is where you can select a mask to apply to the current selection.  First you select the type, then adjust the Mask Value as desired.  Using the Next/Last button will cycle through the various mode subsets. The Mode options are as follows:


Every - Selects every "xth" fixture, where "x" is the number in the counter.  For example, if the number is 3 then every third fixture will be selected.  Pressing Next\Last will cycle through subsets by 3's.
Block -  Selects the first "x" fixtures, where "x" is the number in the counter.  For example if the number is 3, then the first 3 fixtures will be selected, then the next 3 and so on.
Divide - Splits the fixtures into "x" equal blocks.  For example, when you select 12 fixtures then set the counter number to 3 then there will be three blocks of four fixtures.
Mirror - Selects "x" number of fixtures, half from the top of the selection and half from the bottom of the selection.  For instance, if the counter is set to 4 then the first 2 fixtures and the last 2 fixtures in the selection will be selected.  When pressing Next, the subsequent two fixtures at each end will be selected.
Group - Segments the fixtures into the fixture groups as they were originally selected.  For example, if you choose groups 1, 2, 3, and 4 then use the Next/Last keys, it will cycle through the groups instead of the individual fixtures.

Activating any of the above will allow you to cycle through the selections using the Next/Last buttons to enable quick programming.  In addition, if you turn on the Fan/FX toggle then the Grouping selections will also be applicable to the fanning function.  This means that you can quickly fan in groups according to what you have selected.  For instance, if you use the Group mask and have selected four different fixture groups, then your single fanning operation will be split into 4 distinct fans based on these groups in one simple action.  Without this ability, you would have to fan each group individually.


The bottom half of the Grouping Tools window is equally as powerful as the top, but in a different way.  The Actions buttons provide additional tools regarding selection order and overall selection.  The Actions options are as follows:


Revert - If you have made changes in the fixture order, this will revert the selected fixtures to their original selection order. Note that this does not necessarily mean that they will be in numerical order. If you selected fixtures 24 through 1 and then made changes to that order, pressing Revert to selection will return them to 24 through 1 again.
Invert - The fixtures in the Programmer that are selected will become deselected and vice versa.  This button is the equivalent to the / (slash) Enter command.
Invert Mask - This feature works in much the same way as Invert. When pressed, all masked fixtures become unmasked and vice versa.
Random - The order of the selected fixtures in the Programmer can be randomized by pressing the Random button.
Reverse - Similar to randomizing the order of the fixture selection, you can reverse the order by pressing the Reverse button. This will flip the current selection order regardless of whether fixtures are selected or deselected. Reverse can also be used in conjunction with Random.
Sort - Changes the fixture selection order to a numeric method based on the fixture numbers from lowest to highest.

Grouping Tools are extremely powerful in the Martin Professional M-Series controllers.  Below are two videos that further demonstrate the immense control the tool provides.


Thursday, January 28, 2016

M-Series Q-Blender Feature

The Martin M-Series lighting controller range has a really cool and unique software feature called Q-Blender.  This function allows you to stack cues into a list and then instantly spread these different looks across a fader.  This gives you the ability to manually crossfade between looks and create some exciting manual controls.  For instance, you could make a fader that simply moves some fixtures between pre-defined positions as you move the fader up and down.  Alternately you could adjust the color, speed of strobing, iris size, or much more.  I am sure that any programmer can come up with many instances where Q-Blender would be extremely valuable.

Q-Blender is a setting that can only be applied to an Override type of cuelist.  The best option is to first build and record your looks into a cuelist (set to Override).  It is important to remember that override cuelists do NOT use tracking and therefore you need to think about what parameters you are storing into every cue.  You can use the record option "Active & Inactive" to ensure that what you are seeing is being recorded.

Once you have stored your looks, press Options in the top left of the cuelist window.  You will see in the Advanced area the option to active the Q-Blender feature.  Once selected, close the Options window and you are ready to try out your cuelist. 

Looking at the cuelist window, you will see that there are two new columns labeled "From" and "To".  These show the range of the fader that will be assigned to each particular cue.  As you run the fader up and down, the data on stage will crossfade with your manual movement at the given ranges.

You can edit various attributes of the Q-Blender cuelist as well.  For instance, you can change the Fade Mode as well as the range for which each cue is active on the fader.  For instantce, the Fade mode can be changed to snap when you want something to instantly come on and then control subsequent changes with the fader.  By also adjusting the From/To designations of the fader you can have the first bit of the movement activate a look while the subsequent (and evenly distributed) ranges of the fader control all your other cues.

Q-Blender is a very unique and powerful feature of the Martin M-Series lighting controllers.  Programmers and designers will find many different uses for this tool.  For further details, consult the M-Series user manual and watch this video demonstration:
 https://youtu.be/tx4jznXS6e4

Monday, January 11, 2016

M-Series 2D Plan View Basics

Martin has recently released new software for the M-Series controllers that adds an exciting new feature called 2D Plan View.  In its simplest form, this new tool allows users to build custom graphical layouts of their lighting rig.  The 2D Plan View allows for quick fixture selections and also displays fixture output, color, and positional information.  While that is certainly wonderful, the capabilities allow for much more and the 2D Plan View can quickly become a primary workspace for any programmer.

 
The 2D Plan View includes functionality for background images, groups, objects, layers, and pages.  Once configured as desired, the feature essentially allows the programmer to create their own custom selection and visualization screens.

Building a plan is very simple.  First you need to add the 2D Plan window to one of your screens.  Then you can begin to work within the 2D Plan View.  One of the most important functions to
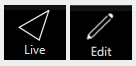
understand is the button in the top left corner of the window.  It toggles between Live and Edit.  As the names suggest, this button allows you to either use the window to select and visualize fixtures or to edit the layout and options of the 2D Plan.


Once you are in Edit mode, select your fixtures in any manner that you would normally select them (command line, groups, fixture center).  Then click on the Add button to open the Select Type to Add window.  
Here you can choose between adding fixtures, groups, or objects to your 2D plan.  When Fixtures is selected you are presented with several options as to how to add the fixtures (Add mode).  Options include individual fixtures, lines, curves, circles, or grids.  Make your choice and click on Place Fixture(s) to be returned to the 2D Plan.


Now click (or click and drag) to add your fixtures to the 2D Plan.  Note that if individual fixtures is selected as the add mode then with each subsequent click the next fixture of the selection will be added.  The example below shows clicking and dragging a selection of 12 fixtures with the line Add mode:

Within no time you will have a layout on your screen.  Now toggle back to Live.  As you begin programming or playing back data you will see this represented on the 2D Plan View.  You can also click on (or touch) individual fixtures to select them or click/touch and drag to select multiple fixtures.  This makes for a great way to grab fixtures during programming.

This is just a very basic explanation of how to get started with the 2D Plan View.  There are tons of things that can be created when you combine groups, objects, background images, pages, and layers to make quite a dynamic setup. 

Check the M-Series support pages for more specific details on the 2D Plan View features and also watch the video below for some cool examples of the possibilities.
https://youtu.be/8AnHolaQ_wg


Thursday, October 8, 2015

Mighty M-Touch Modes

The Martin M-Touch controller for M-Series products can do many amazing things.  I detailed a bit of it in a previous post and now I want to highlight a specific function.
The M-Touch can be used for both programming and playback operations through its dedicated buttons and Force Touch faders.  Just right of center on the M-Touch you will find two rows of buttons that can easily change their function as needed.

Before explaining the functions in detail, lets look at how you can change the mode of these buttons.  At the top you will find a pad with four labels: Play, F-Key, Base, and FX.  A red LED will indicate which mode is currently active.  As you touch anywhere in this rectangular pad, the function (and LED) will toggle between two of the modes (Base/FX or Play/F-Key).  To change to the second pair of options, simply press and hold in the rectangle area for 2 seconds.


When this section of the M-Touch is set to Base, then the 10 buttons map directly to the fixture attributes displayed in the Fixture Parameters screen.  As you toggle between the various attributes, the four programming Force Touch faders will also change to control specific parameters of the selected light(s).


Note that in this mode the ten M-Touch buttons will only access attributes shown on the left row of the attributes in the Fixture Parameters screen.  This means fixture specific parameters only.  To access the attributes shown on the right side of the attributes section (FX, Grouping, Rate) you will have to toggle these M-Touch buttons to the FX mode.


Now the 10 buttons on the M-Touch are mapped to the FX attributes as shown in the Fixture Parameters screen.  As you change between the buttons, the screen and programming fader purposes will change accordingly.  Remember that in both the Base and FX modes, the M-Touch buttons are mapped to only one type (Base or FX) and are oriented from top-down left to right as if in one long list.

When these buttons are placed in the Play mode, they act as an additional 10 playbacks per page!  These are very similar to the Playback Pairs on the  M6 or the quick playbacks on the M1.  You can store, edit, modify and playback anything here.  Note that you can press and hold the Select button on the left side of the M-Touch and then press any of these 10 playback buttons to select as the main cuelist.

The F-Key functionality of the M-Touch allows these 10 buttons to map to the first 10 Programmable Buttons you have assigned.  This is great for changing views selecting groups, presets, banks or many other commands.  Just like with a console, you can press and hold Edit on the M-Touch and select a F-Key to edit its ability.

I love how quick and easy it is to change the mode of these 10 buttons.  You can easily assign them to many different purposes and toggle as needed during your workflow.  With these buttons and more, the Martin M-Touch is a very affordable and extremely useful controller.  And don't forget that it can be used with M-PC as well as any of the M-Series controllers.

Wednesday, August 19, 2015

M-Touch Control

The newest console device for the Martin M-Series line of control consoles is now available, and it is really cool!  The M-Touch is a unique control surface that can be used for both playback and programming when combined with M-PC software or any M-Series console.

The surface of the low-cost controller has new-to-lighting technology utilizing Force Sensitive Resistors (FSR) on both flash keys and faders.  This allows surprising control possibilities based upon velocity and pressure.  In addition there are other touch sensitive keys and even a 5-pin XLR for DMX output.  You really should get your hands on an M-Touch as it is quite a powerful tool when combined with M-Series software.

One of the great features is that the M-Touch can be used with M-PC or used as a wing to any M-Series console.  In fact, you can even connect multiple M-Touch devices into any single system.


In order to do so, you will need to do a bit of configuration.  In the M-Series Menu, click on System then DMX Settings.


Now at the bottom of the screen select the USB2DMX tab and now you will see the M-Touch device (assuming you plugged it into your console/PC) on the top left of the screen.

On the right side of the screen are some options and here you can set the DMX universe to output from the 5-pin XLR (universe 1-4).  You can also set the Wing ID.  If the ID is set to 0 (the default) then it will mimic the first 10 faders on your desk.  If you set it to a higher number, then it will behave as a separate wing from the faders on your desk.  You can now change banks on the M-Touch and console separately!

The M-Touch is an amazing control option and very reasonably priced too.  Check out the videos below for more information and stay tuned for another blog post with some advanced functions of the M-Touch.
https://youtu.be/wLW7ID7zqu8

https://youtu.be/VN0F9beNTtU

Thursday, July 2, 2015

M-Series Pro Tip: Create a Fanning Button


Fanning of parameters, effects, and time is a very powerful feature and the M-Series has a wonderful amount of tools to assist with fanning.  Be sure to read the M-Series User Manual for a full description of what is available.

I recently learned of a cool undocumented trick for fast access to fanning.  While the standard fanning abilities using the LCD/mini-touchscreen options are useful, I prefer a physical button that I can simply hold down while I adjust an attribute to create a basic fan.  This can be achieved easily by assigning the Fan function to an F-Key.

To set this up, first you will need to edit an F-Key.  Press and hold EDIT while also pressing the desired F-Key.  This will open the F-Key editor window.  On the top left, select "Command" then in the "Categories" column select "Channel Visualization".


The center of the screen will now display several options and you will want to select the last one labeled "Fan".  Press "Apply" on the bottom of the screen to accept this change.

One-handed fanning is possible as well!


Now anytime that you want to fan parameters of a fixture, simply select some fixtures, press and hold your F-Key and turn the desired parameter encoder (or track belt) to fan the parameter.  This works great to create basic position fans.  


If you wish to be more advanced, you can open the fanning screen to further adjust or change your fan type.  Or to be really cool, you can assign many of these fanning functions to other F-Keys as well.

Have fun fanning and customizing your M-Series controller.

Tuesday, May 19, 2015

M-Series Multi-Part Fixtures

The M-Series consoles and PC software have a really great feature for programming complex fixtures.  Many LED fixtures utilize multiple cells or pixels contained within a single fixture instance.  On many console systems you have to program each part as an individual fixture.  However, the M-Series allows you to utilize Multi-Part Fixtures to aid in patching and programming these types of fixtures.

When you patch a Mulit-Part fixture, the fixture ID controls the overall fixture and each  individual cell is assigned a point number.
So if you patch an LED strip light as fixture 401 the software will give you fixtures 401, 401.1, 401.2, 401.3, 401.4, 401.5, and 401.6.  Fixture 401 is the entire fixture and the point numbers are each of the cells.  You can then use these numbers when programming and select just the portion of the fixture you need.

However the M-Series software does much more to assist you with Multi-Part fixtures.  For instance, it intelligently knows that if you select the master (401) at full then all the cells will go to full along with the master.  Also if you use the Grouping button in the Fixture Center then you can change to a Block Mask value to allow the next/back keys to jump between each entire fixture.  Additionally if you use the Slice function you can make quick fixture selections of specific cells within a range of fixtures.  With these tools and many others, programming of multi-cell fixtures becomes a breeze on M-Series controllers!

The Multi-Part fixture functionality of the M-Series is useful with many different types of fixtures including Aura, Aura XB, and Quantum Wash as well as many strip lights and other multi-pixel units.

For more details about M-Series Multi-Part Fixtures consult the user manual and watch this video: