Wednesday, February 24, 2016

Make Dimmer Curves Your New Friend

There is nothing like a perfectly smooth fade to blackout over ten seconds to evoke emotion at the end of a scene or song.  The dimming ability of any lighting product is determined by several factors including the light source type, dimming method, control signal and more.  Generally, designers prefer a smooth dimming ability that provides a seamless and even change in intensity whether increasing or decreasing in value.

All Martin Professional lighting products default to a smooth dimmer curve that is ideal for most situations.  However, there may be instances where you wish to match the dimming abilities of other products such as cyc lights or incandescent lamps, or you just prefer a different path.  All current Martin Professional products include the ability to select between four different dimming curves from either the menu system or DMX.  With DMX, you can actually change the dimming curve on a cue-by-cue basis!  Lets look at the various options:


Linear - provides an even distribution of light in correlation to the DMX level of the dimmer channel(s).  Although mathematically uniform, this dimmer curve is often not the most desired by lighting designers.


S-Curve - provides a finer control at lower and higher levels while being more coarse at medium levels.  This dimming curve best emulates a typical incandescent lamp's dimming abilities.  This is also the default and often considered the most natural dimming curve.
  

Square Law - provides a finer control at low levels and coarser at high levels.  Useful for low level scenes and chases as more DMX values are allocated for dimming at the bottom end.


Inverse Square Law - provides a finer control at high levels and coarser at low levels.  Useful when not dimming all the way out or when less low level control is desired (snap on/off).


Often it is best to ensure that your lighting console is properly crossfading the dimming channel(s) in a linear fashion. Otherwise there may be conflicts between how the console is fading and how the light is responding.  It is also important that all your fixtures are set to the desired dimming curve.  A good practice is to set all fixtures to the factory defaults when starting a new show.  Then make changes in the menu or via DMX as needed.  Otherwise you could end up with some fixtures dimming differently than others.  In addition, if you do change the dimmer curve for a particular cue, be sure to set it back to the default in the following cue!

Adjusting the dimmer curve is a very useful tool when applied to specific situations.  Martin Professional maintains the same four types of dimmer curves and control abilities across the entire range of Martin Professional products.  This ensures simplicity and consistency when using MAC Vipers, MAC Auras, MAC Quantums, or the Atomic 3000 LED.

Thursday, January 28, 2016

M-Series Q-Blender Feature

The Martin M-Series lighting controller range has a really cool and unique software feature called Q-Blender.  This function allows you to stack cues into a list and then instantly spread these different looks across a fader.  This gives you the ability to manually crossfade between looks and create some exciting manual controls.  For instance, you could make a fader that simply moves some fixtures between pre-defined positions as you move the fader up and down.  Alternately you could adjust the color, speed of strobing, iris size, or much more.  I am sure that any programmer can come up with many instances where Q-Blender would be extremely valuable.

Q-Blender is a setting that can only be applied to an Override type of cuelist.  The best option is to first build and record your looks into a cuelist (set to Override).  It is important to remember that override cuelists do NOT use tracking and therefore you need to think about what parameters you are storing into every cue.  You can use the record option "Active & Inactive" to ensure that what you are seeing is being recorded.

Once you have stored your looks, press Options in the top left of the cuelist window.  You will see in the Advanced area the option to active the Q-Blender feature.  Once selected, close the Options window and you are ready to try out your cuelist. 

Looking at the cuelist window, you will see that there are two new columns labeled "From" and "To".  These show the range of the fader that will be assigned to each particular cue.  As you run the fader up and down, the data on stage will crossfade with your manual movement at the given ranges.

You can edit various attributes of the Q-Blender cuelist as well.  For instance, you can change the Fade Mode as well as the range for which each cue is active on the fader.  For instantce, the Fade mode can be changed to snap when you want something to instantly come on and then control subsequent changes with the fader.  By also adjusting the From/To designations of the fader you can have the first bit of the movement activate a look while the subsequent (and evenly distributed) ranges of the fader control all your other cues.

Q-Blender is a very unique and powerful feature of the Martin M-Series lighting controllers.  Programmers and designers will find many different uses for this tool.  For further details, consult the M-Series user manual and watch this video demonstration:
 https://youtu.be/tx4jznXS6e4

Wednesday, January 20, 2016

Beams, Beams, Beams!

Tight, narrow beams of light are a staple of lighting design and Martin Professional has several products that create stunning beams of light.  These units are very impressive when used in large quantities and can wow audiences and professionals alike.


The Martin RUSH MH3 Beam and RUSH MH4 Beam fixtures are designed for maximum beam effects.  Each can produce extremely narrow rays of light that seem to go on endlessly.  The RUSH MH3 Beam boasts a zoom range of 1° to 3.8° while the RUSH MH4 Beam has a powerful fixed beam angle of 3°.


Both units include a color wheel, gobo wheel, rotating prism, and dimmer.  Even though they are based on low wattage lamps, the small aperture and narrow lensing allows for an extremely bright output.  In fact, the collimated beam is so intense that you MUST be careful where you point them as it is very easy to burn things.

For even brighter and more feature rich beams, consider the Martin MAC Viper Beam.  This fixture is comprised of the MAC Viper AirFX with a special lens attached to the front of it.  The micro-fresnel lens is easy to install and produces amazing pencil-thin beams of light.  In fact, the unit has a zoom range of 7.5°-31°.  When combined with all the built in features of the MAC Viper AirFX you get an amazing beam fixture that can create a multitude of looks.  In addition you can use the internal iris to narrow the output down to near zero degrees!  Don't worry if you cant get your hands on the MAC Viper Beam, the MAC Viper AirFX on its own can also create some stunning beam effects with its native lens too.

Powerful narrow beams have been all the rage on many stages in recent years and are here to stay.  It is important to understand how to design and program with this type of fixture and to be aware of the dangers too.  Martin Professional has a broad range of products to help you create various types of narrow beams on your stage.

Monday, January 11, 2016

M-Series 2D Plan View Basics

Martin has recently released new software for the M-Series controllers that adds an exciting new feature called 2D Plan View.  In its simplest form, this new tool allows users to build custom graphical layouts of their lighting rig.  The 2D Plan View allows for quick fixture selections and also displays fixture output, color, and positional information.  While that is certainly wonderful, the capabilities allow for much more and the 2D Plan View can quickly become a primary workspace for any programmer.

 
The 2D Plan View includes functionality for background images, groups, objects, layers, and pages.  Once configured as desired, the feature essentially allows the programmer to create their own custom selection and visualization screens.

Building a plan is very simple.  First you need to add the 2D Plan window to one of your screens.  Then you can begin to work within the 2D Plan View.  One of the most important functions to
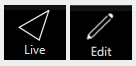
understand is the button in the top left corner of the window.  It toggles between Live and Edit.  As the names suggest, this button allows you to either use the window to select and visualize fixtures or to edit the layout and options of the 2D Plan.


Once you are in Edit mode, select your fixtures in any manner that you would normally select them (command line, groups, fixture center).  Then click on the Add button to open the Select Type to Add window.  
Here you can choose between adding fixtures, groups, or objects to your 2D plan.  When Fixtures is selected you are presented with several options as to how to add the fixtures (Add mode).  Options include individual fixtures, lines, curves, circles, or grids.  Make your choice and click on Place Fixture(s) to be returned to the 2D Plan.


Now click (or click and drag) to add your fixtures to the 2D Plan.  Note that if individual fixtures is selected as the add mode then with each subsequent click the next fixture of the selection will be added.  The example below shows clicking and dragging a selection of 12 fixtures with the line Add mode:

Within no time you will have a layout on your screen.  Now toggle back to Live.  As you begin programming or playing back data you will see this represented on the 2D Plan View.  You can also click on (or touch) individual fixtures to select them or click/touch and drag to select multiple fixtures.  This makes for a great way to grab fixtures during programming.

This is just a very basic explanation of how to get started with the 2D Plan View.  There are tons of things that can be created when you combine groups, objects, background images, pages, and layers to make quite a dynamic setup. 

Check the M-Series support pages for more specific details on the 2D Plan View features and also watch the video below for some cool examples of the possibilities.
https://youtu.be/8AnHolaQ_wg


Tuesday, December 22, 2015

Martin LED Products Video Tracking


Martin Professional has built many great features into their lights, yet some go unnoticed or are misunderstood.  All Martin LED fixtures operate at a high refresh rate (generally >1200hz) and are designed for use with HD/high-speed video cameras.  However, there is also an additional user setting called "Video Tracking" that provides an optimization for dimming and color changing when using Martin LED fixtures with a video based control system.


The video tracking feature will change the internal methodology used to control the dimming of the LEDs.  This is important ONLY when using Martin LED products to display a video signal (pixel mapping).  In normal use, the fixture processes the DMX signal it receives, tracking (or smoothing out) changes in values in order to ensure smooth fading between colors and/or intensities. This signal processing takes fractions of a second and is normally invisible, but if the fixture is used to display video the processing can interfere with video response times.

In situations where a video image is controlling intensity and/or color it is advised to enable video tracking.  If you are using pixel mapping from a console or media server or even a Martin P3 Processor to convert a video file to DMX values then it is suggested that you utilize the video tracking feature.  When enabled, the fixture will not ‘smooth out’ DMX input but instead will snap instantly when a DMX value changes.  This leads to the best representation of the color changes coming from the video file as the DMX value changes correlate instantly without smoothing

For best results, Martin recommends that you enable video tracking during video display control and disable it (the default setting) during normal DMX control.  The video tracking feature is found on  MAC Quantum Wash, MAC Quantum Profile, MAC Aura XB, and Atomic 3000 LED fixtures.  The setting can be adjusted either via DMX (found in the control channel) or via the fixture's menu system.  Note: The video tracking feature is referred to as "video dimming" on the MAC Aura XB.
With a proper understanding of the internal software of Martin LED products, any programmer or designer can optimize the fixtures for control from video or DMX.

Monday, December 7, 2015

Wash the Stage with Color and Style

The Martin MAC Viper Wash and MAC Viper WASH DX are extraordinarily wonderful discharge sourced wash lights.  They both are very similar in terms of specifications and pricing with the difference being that the DX model includes an internal barndoor system.  Because the price is so similar, most designers and rental companies choose the DX model.

Using the same 1000w lamp as all Viper models, the MAC Viper WASH DX has a solid output of over 33,000 lumens and a high CRI. The fixture has a native color temperature of 6500K while a variable CTO filter allows the user to adjust the color temperature down to 3200K.  The color system is the same ultra smooth CMY system found in all Vipers.

Many theatrical and television designers prefer the MAC Viper Wash DX to other wash lights (including LED models) because of the output, light quality, smooth color mixing, and small size.  In addition, it has received high marks for how quiet the unit is.  Many shows on Broadway are using the MAC Viper Wash DX as they have found it to be near silent.  The fixture is also popular on major auto shows, corporate events and more.

The internal barndoor system (framing shutters) help to turn the output from round to various shapes.  This is great for washing banners or any unique area requiring a strong cut off of output.  Plus both versions include an iris for further beam size control.

If you have not had a chance to use the MAC Viper Wash or MAC Viper Wash DX yet, you should get your hands on one soon. 


Tuesday, November 24, 2015

Multiple Heads Better Than One!

The RUSH line of products from Martin includes an exciting fog/haze product called the RUSH Club Smoke Dual

The system can utilize fog and/or haze heads with the same fluid, thus the word "dual" in the product's name.  It is actually a fog/hazing system that allows users to remotely locate the fluid reservoir and connect up to six fog and/or haze heads


That's right, you can keep the pump unit (fluid reservoir) on the ground or at the DJ booth and have the heads located anyplace in the rig.  The pump unit has a 10 liter reservoir which is sure last quite along time in most environments.  Plus since it can be mounted on the ground, refilling is extremely simple.  In addition because the reservoir is remote, you can aim the heads in any direction including straight up or down!


The fog and/or haze heads connect to the pump unit via a small hose for the fluid and you can have up to three distinct zones of control.  Each zone can be controlled individually as the heads are also connected to the pump unit and to each other via standard RJ45 Ethernet cables.  In fact, you can even daisy chain the units that are on the same zone.  Configuration is simple as there are no network settings to worry about.


The entire RUSH Club Smoke Dual system is very versatile and extremely useful in permanent installations.  Imagine having the fluid located in one easy-to-replace location while having six different heads throughout the venue.  I love that one zone could be hazers, while another could be fog in the rig, and a third could be floor fog effects.


Control is very simple via DMX, direct controls on the pump unit, or a special wired remote.  With DMX you can easily trigger each of the three zones plus a fourth channel provides access to control functions.  The fog and haze heads have also been designed with forethought as the status LED's for Heat and Ready are on the side of the unit instead of the back.  This makes it easy to spot the status from the ground and ensure the heads are ready.


The RUSH Club Smoke Dual has been designed with longevity in mind and is a perfect choice for any installation.  With a very affordable price, there is no reason not to invest in the RUSH Club Smoke Dual and open up your designs to new possibilities.