Monday, April 18, 2016

Atomic Colors for the Atomic 3000 LED


The Martin Professional Atomic 3000 LED is an amazing strobe that I have written about before.  Of the many features, one of the coolest is that the unit works with the original Atomic Colors.  This means you can achieve colored strobes in addition to just white output.


Furthermore, when combined with the Aura effect, many unique looks become possible.  By using the properties of wavelength transmission you can create some interesting effects.  For instance, if the aura effect is in red and you have a magenta scroll in place then the audience will still see a red aura.  However, when the white LEDs of the main strobe turn on they will output a magenta color.  This can prove to be very interesting as a red light appears to output magenta.  This works with other colors and other combinations as well.


When using the Atomic Colors on the Atomic 3000 LED there are a few things you must be sure to configure on the Atomic Color unit.  First, be sure to always use the internal power supply in the Atomic 3000 LED.  This provides power and communication to the scroller and ensures that the Atomic 3000 LED is aware that the scroller is connected.  Simply plug the 4-pin XLR between the Atomic 3000 LED and the Atomic Colors.


Next, set the following menu items on the Atomic Color unit:

  • Set Fan Speed Fn to maximum: Fn4.
  • Set Light-Activated Fan LF to constant fan operation, not light-operated: LF0.
  • Set Gel Saver mode GL to active: GL1.


You should also always check in the Atomic 3000 LED menu that is confirms that the scroller is connected: INFO COLOR SCROLLER CONNECTED

Now your Atomic 3000 LED with Atomic Colors is ready to go!  Programming is very straight forward as long as you have the correct libraries and DMX address in your console.  Have fun strobing in color and creating awesome effects by combining the aura and the scroller colors.

Friday, April 8, 2016

M-Series Grouping Tools

Martin Professional's M-Series controllers have a host of powerful features for programming lighting.  While most consoles provide groups and simple fixture selection tools, the Grouping Tools window in the M-Series offers unprecedented abilities.  In short, the tool allows for the easy division of selected fixtures into various subsets; but it can do much more. It is very useful when creating fixture groups; plus when combined with the Next/Last buttons, rapid manipulation of selected fixtures becomes possible.


Before you can use the Grouping Tools, you must select the fixtures you wish to work with.  Then the various options in the Grouping Tools window become available.  The top right of the window will also indicate the quantity of fixtures in the current selection.  The rest of the Grouping Tools window can be split into two distinct parts: Mode and Actions.


The Mode section of the window is where you can select a mask to apply to the current selection.  First you select the type, then adjust the Mask Value as desired.  Using the Next/Last button will cycle through the various mode subsets. The Mode options are as follows:


Every - Selects every "xth" fixture, where "x" is the number in the counter.  For example, if the number is 3 then every third fixture will be selected.  Pressing Next\Last will cycle through subsets by 3's.
Block -  Selects the first "x" fixtures, where "x" is the number in the counter.  For example if the number is 3, then the first 3 fixtures will be selected, then the next 3 and so on.
Divide - Splits the fixtures into "x" equal blocks.  For example, when you select 12 fixtures then set the counter number to 3 then there will be three blocks of four fixtures.
Mirror - Selects "x" number of fixtures, half from the top of the selection and half from the bottom of the selection.  For instance, if the counter is set to 4 then the first 2 fixtures and the last 2 fixtures in the selection will be selected.  When pressing Next, the subsequent two fixtures at each end will be selected.
Group - Segments the fixtures into the fixture groups as they were originally selected.  For example, if you choose groups 1, 2, 3, and 4 then use the Next/Last keys, it will cycle through the groups instead of the individual fixtures.

Activating any of the above will allow you to cycle through the selections using the Next/Last buttons to enable quick programming.  In addition, if you turn on the Fan/FX toggle then the Grouping selections will also be applicable to the fanning function.  This means that you can quickly fan in groups according to what you have selected.  For instance, if you use the Group mask and have selected four different fixture groups, then your single fanning operation will be split into 4 distinct fans based on these groups in one simple action.  Without this ability, you would have to fan each group individually.


The bottom half of the Grouping Tools window is equally as powerful as the top, but in a different way.  The Actions buttons provide additional tools regarding selection order and overall selection.  The Actions options are as follows:


Revert - If you have made changes in the fixture order, this will revert the selected fixtures to their original selection order. Note that this does not necessarily mean that they will be in numerical order. If you selected fixtures 24 through 1 and then made changes to that order, pressing Revert to selection will return them to 24 through 1 again.
Invert - The fixtures in the Programmer that are selected will become deselected and vice versa.  This button is the equivalent to the / (slash) Enter command.
Invert Mask - This feature works in much the same way as Invert. When pressed, all masked fixtures become unmasked and vice versa.
Random - The order of the selected fixtures in the Programmer can be randomized by pressing the Random button.
Reverse - Similar to randomizing the order of the fixture selection, you can reverse the order by pressing the Reverse button. This will flip the current selection order regardless of whether fixtures are selected or deselected. Reverse can also be used in conjunction with Random.
Sort - Changes the fixture selection order to a numeric method based on the fixture numbers from lowest to highest.

Grouping Tools are extremely powerful in the Martin Professional M-Series controllers.  Below are two videos that further demonstrate the immense control the tool provides.


Wednesday, March 2, 2016

P3 Processing vs. DMX Control

Martin Professional makes some great creative video products that can add excitement and imagery to any production or architectural installations.  All the products including VDO Sceptron, Exterior Pixline, and VC grids, strips, and dots can be controlled by either DMX or via the Martin P3 system controller.

With DMX you simply address each product via RDM and then use a lighting controller or media server to map the control of the pixels.  However there are many downsides to using DMX to control pixels and display video.  These include latency, poor smoothing, steppiness, artifacts, and synchronization problems.  Although many productions can be successful when controlled by DMX, most users prefer the P3 control system for the best video playback on any of Martin's video products.

The P3 system controller allows not just easy setup and configuration of a video system, but it also processes video input exceptionally well.  With a range of products available including the P3-100, P3-200, P3-300, and P3-PC the system is totally scale-able depending on the number of pixels you wish to control.  Plus for no cost, you can use P3-PC to prepare your video mappings and use test program for setups. (See this previous post about P3-PC)


The P3 system controllers also have the ability to receive 2-way communication from each connected device.  This allows for easy identification and setup as well as thermal reporting and throttling.  The P3 system is much more than a video processor as it provides many control possibilities.  Color temperature adjustments, on-the-fly mapping changes, as well as gamma adjustments are just some of the robust features.   In addition, users can now install P3 onto Hippotizer V4 media servers from GreenHippo.  This functionality allows direct P3 control and processing to be output from the media server itself.

To fully understand the difference between using DMX and a P3 system controller check out this video that details the differences:

Wednesday, February 24, 2016

Make Dimmer Curves Your New Friend

There is nothing like a perfectly smooth fade to blackout over ten seconds to evoke emotion at the end of a scene or song.  The dimming ability of any lighting product is determined by several factors including the light source type, dimming method, control signal and more.  Generally, designers prefer a smooth dimming ability that provides a seamless and even change in intensity whether increasing or decreasing in value.

All Martin Professional lighting products default to a smooth dimmer curve that is ideal for most situations.  However, there may be instances where you wish to match the dimming abilities of other products such as cyc lights or incandescent lamps, or you just prefer a different path.  All current Martin Professional products include the ability to select between four different dimming curves from either the menu system or DMX.  With DMX, you can actually change the dimming curve on a cue-by-cue basis!  Lets look at the various options:


Linear - provides an even distribution of light in correlation to the DMX level of the dimmer channel(s).  Although mathematically uniform, this dimmer curve is often not the most desired by lighting designers.


S-Curve - provides a finer control at lower and higher levels while being more coarse at medium levels.  This dimming curve best emulates a typical incandescent lamp's dimming abilities.  This is also the default and often considered the most natural dimming curve.
  

Square Law - provides a finer control at low levels and coarser at high levels.  Useful for low level scenes and chases as more DMX values are allocated for dimming at the bottom end.


Inverse Square Law - provides a finer control at high levels and coarser at low levels.  Useful when not dimming all the way out or when less low level control is desired (snap on/off).


Often it is best to ensure that your lighting console is properly crossfading the dimming channel(s) in a linear fashion. Otherwise there may be conflicts between how the console is fading and how the light is responding.  It is also important that all your fixtures are set to the desired dimming curve.  A good practice is to set all fixtures to the factory defaults when starting a new show.  Then make changes in the menu or via DMX as needed.  Otherwise you could end up with some fixtures dimming differently than others.  In addition, if you do change the dimmer curve for a particular cue, be sure to set it back to the default in the following cue!

Adjusting the dimmer curve is a very useful tool when applied to specific situations.  Martin Professional maintains the same four types of dimmer curves and control abilities across the entire range of Martin Professional products.  This ensures simplicity and consistency when using MAC Vipers, MAC Auras, MAC Quantums, or the Atomic 3000 LED.

Thursday, January 28, 2016

M-Series Q-Blender Feature

The Martin M-Series lighting controller range has a really cool and unique software feature called Q-Blender.  This function allows you to stack cues into a list and then instantly spread these different looks across a fader.  This gives you the ability to manually crossfade between looks and create some exciting manual controls.  For instance, you could make a fader that simply moves some fixtures between pre-defined positions as you move the fader up and down.  Alternately you could adjust the color, speed of strobing, iris size, or much more.  I am sure that any programmer can come up with many instances where Q-Blender would be extremely valuable.

Q-Blender is a setting that can only be applied to an Override type of cuelist.  The best option is to first build and record your looks into a cuelist (set to Override).  It is important to remember that override cuelists do NOT use tracking and therefore you need to think about what parameters you are storing into every cue.  You can use the record option "Active & Inactive" to ensure that what you are seeing is being recorded.

Once you have stored your looks, press Options in the top left of the cuelist window.  You will see in the Advanced area the option to active the Q-Blender feature.  Once selected, close the Options window and you are ready to try out your cuelist. 

Looking at the cuelist window, you will see that there are two new columns labeled "From" and "To".  These show the range of the fader that will be assigned to each particular cue.  As you run the fader up and down, the data on stage will crossfade with your manual movement at the given ranges.

You can edit various attributes of the Q-Blender cuelist as well.  For instance, you can change the Fade Mode as well as the range for which each cue is active on the fader.  For instantce, the Fade mode can be changed to snap when you want something to instantly come on and then control subsequent changes with the fader.  By also adjusting the From/To designations of the fader you can have the first bit of the movement activate a look while the subsequent (and evenly distributed) ranges of the fader control all your other cues.

Q-Blender is a very unique and powerful feature of the Martin M-Series lighting controllers.  Programmers and designers will find many different uses for this tool.  For further details, consult the M-Series user manual and watch this video demonstration:
 https://youtu.be/tx4jznXS6e4

Wednesday, January 20, 2016

Beams, Beams, Beams!

Tight, narrow beams of light are a staple of lighting design and Martin Professional has several products that create stunning beams of light.  These units are very impressive when used in large quantities and can wow audiences and professionals alike.


The Martin RUSH MH3 Beam and RUSH MH4 Beam fixtures are designed for maximum beam effects.  Each can produce extremely narrow rays of light that seem to go on endlessly.  The RUSH MH3 Beam boasts a zoom range of 1° to 3.8° while the RUSH MH4 Beam has a powerful fixed beam angle of 3°.


Both units include a color wheel, gobo wheel, rotating prism, and dimmer.  Even though they are based on low wattage lamps, the small aperture and narrow lensing allows for an extremely bright output.  In fact, the collimated beam is so intense that you MUST be careful where you point them as it is very easy to burn things.

For even brighter and more feature rich beams, consider the Martin MAC Viper Beam.  This fixture is comprised of the MAC Viper AirFX with a special lens attached to the front of it.  The micro-fresnel lens is easy to install and produces amazing pencil-thin beams of light.  In fact, the unit has a zoom range of 7.5°-31°.  When combined with all the built in features of the MAC Viper AirFX you get an amazing beam fixture that can create a multitude of looks.  In addition you can use the internal iris to narrow the output down to near zero degrees!  Don't worry if you cant get your hands on the MAC Viper Beam, the MAC Viper AirFX on its own can also create some stunning beam effects with its native lens too.

Powerful narrow beams have been all the rage on many stages in recent years and are here to stay.  It is important to understand how to design and program with this type of fixture and to be aware of the dangers too.  Martin Professional has a broad range of products to help you create various types of narrow beams on your stage.

Monday, January 11, 2016

M-Series 2D Plan View Basics

Martin has recently released new software for the M-Series controllers that adds an exciting new feature called 2D Plan View.  In its simplest form, this new tool allows users to build custom graphical layouts of their lighting rig.  The 2D Plan View allows for quick fixture selections and also displays fixture output, color, and positional information.  While that is certainly wonderful, the capabilities allow for much more and the 2D Plan View can quickly become a primary workspace for any programmer.

 
The 2D Plan View includes functionality for background images, groups, objects, layers, and pages.  Once configured as desired, the feature essentially allows the programmer to create their own custom selection and visualization screens.

Building a plan is very simple.  First you need to add the 2D Plan window to one of your screens.  Then you can begin to work within the 2D Plan View.  One of the most important functions to
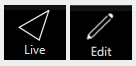
understand is the button in the top left corner of the window.  It toggles between Live and Edit.  As the names suggest, this button allows you to either use the window to select and visualize fixtures or to edit the layout and options of the 2D Plan.


Once you are in Edit mode, select your fixtures in any manner that you would normally select them (command line, groups, fixture center).  Then click on the Add button to open the Select Type to Add window.  
Here you can choose between adding fixtures, groups, or objects to your 2D plan.  When Fixtures is selected you are presented with several options as to how to add the fixtures (Add mode).  Options include individual fixtures, lines, curves, circles, or grids.  Make your choice and click on Place Fixture(s) to be returned to the 2D Plan.


Now click (or click and drag) to add your fixtures to the 2D Plan.  Note that if individual fixtures is selected as the add mode then with each subsequent click the next fixture of the selection will be added.  The example below shows clicking and dragging a selection of 12 fixtures with the line Add mode:

Within no time you will have a layout on your screen.  Now toggle back to Live.  As you begin programming or playing back data you will see this represented on the 2D Plan View.  You can also click on (or touch) individual fixtures to select them or click/touch and drag to select multiple fixtures.  This makes for a great way to grab fixtures during programming.

This is just a very basic explanation of how to get started with the 2D Plan View.  There are tons of things that can be created when you combine groups, objects, background images, pages, and layers to make quite a dynamic setup. 

Check the M-Series support pages for more specific details on the 2D Plan View features and also watch the video below for some cool examples of the possibilities.
https://youtu.be/8AnHolaQ_wg