Monday, November 6, 2017

Understanding Color Rendering


The automated lighting industry is full of different metrics used to compare diverse properties of various products.  Most people understand measurements such as Lumens, Lux, Foot-Candles, hertz, and dB, but color rendering has recently become the newest concern for many.  Color rendering scores can help designers determine how well colors (sets, costumes, skin tones) will look when illuminated by a particular light.

Many manufacturers will refer to the CRI of their product, while others are using CQS, TM-30, and/or TLCI as methodologies for explaining the color rendering properties of lighting products.  These scales are important as they describe the quality of the light and how colors will appear when illuminated by a specific source.  The following provides a brief overview of each color rendering methodology and how the measurements are achieved.

Measurement Basics
Every color rendering system has the same goal: to describe how well a light source (or fixture) will render specific colors compared to a known source (typically pure daylight or pure tungsten).  Usually there is a defined set of colors and a score is given based on how well each color looks when lit by the source compared to the reference.  If a color does not look good under a specific source (think a red shirt under a florescent) then a lower score is given for that particular color.  The measurements for all the chart's colors are then averaged together to create an overall score (usually on a 0-100 scale). Note that a perfect score is only possible with the original source (pure daylight or pure tungsten).


Because it can be very difficult to actually look at a color reference chart and determine the rendering ability of a source, light meters are regularly used to measure color rendering.  They will examine the light coming from a source and use complex mathematical formulas to calculate the color rendering score based on the source's color temperature and spectrum.


CRI
CRI or Color Rendering Index is currently the most commonly provided metric for color rendering, which is a shame as it is also the poorest.  Basically it consists of eight* colors that are given a 0-100 score and simply averaged together.  The eight colors primarily consist of skin and nature tones, but not any saturated hues.  Because these eight values are simply averaged together it is possible to get skewed results.

For instance, a source that scores high on seven of the values, but very low on one could still result in a high CRI value.  Furthermore, manufacturers can adjust the CRI score simply by filtering certain wavelengths to get to a better average score (although not necessarily better light output).

*The full CRI specification consists of 14 colors, but typically only the first eight are used for calculation.

CQS
The Color Quality Scale (CQS) uses 15 color references and instead of a basic average, it uses a root-mean-square calculation methodology.  This squares each value before averaging resulting in a much more fair result where even one bad value will greatly affect the total result.  The chart contains many saturated colors and is considered a much better scale than CRI.

TM-30
The Illuminating Engineering Society (IES) created the TM-30 metric to replace CRI.  This scale uses 99 color references based on real world color objects and again uses the root-mean-square calculation to determine the final score.  This is known as the TM-30 Fidelity index (Rf).  This standard also provides a Gamut index (Rg) which scores the saturation of the colors as over or under saturated.  An Rg score of 100 means a perfect match, with greater than 100 being over saturated and below 100 being under saturated.  Furthermore, TM-30 reports provide color vector graphics to visibly display which wavelengths are over or under saturated.

TLCI

The Television Lighting Consistency Index is specifically designed to represent  how colors will render on camera as opposed to the human eye like the other metrics.  Using 18 colors and the root-mean-square calculation method, TLCI results also provide data to help make appropriate corrections to the video image.


With so many different color rendering metrics to choose from, it can be confusing to determine how well a specific light will render colors.  It is important when comparing fixtures to understand how scores are calculated and what they are based upon.  CRI is the worst choice, while CQS and TM-30 are much better references.  TLCI should always be used for television.  Further detailed descriptions of each of these color rendering methods can be found on Mike Wood's website


Martin lighting now provides full metrics for all the above color rendering scales in fixture photometric reports starting with the MAC Encore series.


Tuesday, August 1, 2017

Martin Fixture Quick Reference Charts

Martin has a great lineup of various automated luminaries and it can be confusing to understand the differences and similarities between the products.  Comparison charts are great to help as they provide an easy reference to the basic features and specifications.  Below you will find charts that detail Martin products by category:
 
These charts will be updated as new products are released.  Stay tuned for more soon!  For full product details and specifications, please visit www.martin.com.

Monday, June 5, 2017

Martin M-Series New View Management


Martin has recently released version 3.70 of the M-Series software which brings exciting new features to the console platform.  The development team has redesigned the views system in incredible ways that also opens the door to more new features coming soon.  Although existing views from previous software versions are not importable, that is a small price to pay for the powerful new system.

New tools allow for simple layout creations, configuring of monitors, storing of views, quick recalls and much more.
 
One of the key benefits of the new system is that all views now work and adjust across all consoles and M-PC!  This is a great tool that allows programmers to prep or edit on M-PC and then load their show into an M-Series console without having to change their views and screens.  Of course this works the other way around and between the various console models too.  Plus there are remarkable new tools for creating views and managing all your windows.


A new concept called Workspaces allows a quick toggle to change the behavior of the sidebar, views, and function keys.  This is useful for creating your own different "modes of operation" on a console or M-PC system.

Version 3.70 of M-Series software also includes many more changes and enhancements when working with views, windows, and screens.  It is essential to understand the relevant terminology:

Screen The actual monitor. This can be a single touch, multi touch or non touch screen. The position and resolution can be changed.
Sidebar A small strip on the left or right edge of a screen.
Toolbar A small bar shown at the top edge of a screen.
Layout Arrangement of docking spaces (3 columns, 4 boxes etc).
Window Contains the content (like presets, groups, clock, etc...).
View Arrangement of layouts and windows placed in them. With this you can change the content on one or multiple screens at once.
View directory A collection of all views within a show. A show has only one directory that is shared in a network environment.
Workspaces The screen sidebar show the content of one workspace. It is a mixture of views and function assignments.
Workspace Browser The user can switch workspaces to get another set of assignments in the screen sidebar. Workspaces can be added, copied, moved and deleted.

The following video explains all the changes and new features in detail.  Take the time to watch the video and try out the new features on your next M-Series show!  https://youtu.be/8nw1Fahp7eY

Wednesday, April 26, 2017

4 Rules for Changing Gobos


Hard edge, spot, profile, performance, and other terms are used to describe automated fixtures that can project a sharp image.  Most of these units also make use of gobos for projecting images from the abstract to the literal.

While fixtures from Martin such as the MAC Viper Profile or MAC Axiom Hybrid come with a great selection of stock gobos, many LD's prefer to load custom gobos.  Care must be taken when changing and handling gobos and certain rules should be followed to help ensure the proper life of both the gobo and the lighting fixture.

Rule #1: Gobo Handling
Most automated luminarires utilize glass gobos, although a few also may use metal gobos.  No matter the material, there are basics that are required when handling these tiny pieces of art.
  • Always treat gobos with the upmost care; store them in a dust free environment and make sure they don't rub or scratch each other.
  • It is best to wear gloves when handling gobos as this will eliminate fingerprints and other oils from transferring to the glass or metal.
  • Always ensure the gobo is clean of dust, oil, or other contaminants before placing in a fixture.  Use a soft, lint-free cloth or compressed air to clean any dirty gobos.

Rule #2: Gobo Placement
Glass gobos are typically made from a borosilicate with an aluminum coating on one side.  You MUST ensure that the coated side is facing away from the lamp or source otherwise it could cause the gobo to crack.  In addition improper placement could cause unwanted reflections within the luminaire.

To determine which side of the glass is the coated side, use the "pencil test".  Simply place the tip of a pencil or other small object near the edge of the glass.  If the reflection is right next to the object then you have found the coated side.  The un-coated or "glass" side will appear with the reflection a small distance from the object.  Be careful though and ensure you do not scratch or mark the gobo with your object.

Some gobos are not coated and instead are made from a unique textured glass.  Always be sure to place the textured side towards the lamp or source.  The only exception would be if the textured glass has also been coated for color or effect.  In this case you still want the coated side away from the light source.

Rule #3: Consider the Optics
The optics of your automated lighting fixture will cause images to project "backwards" from what you may think.  Always consider this when inserting gobos that have a specific look or direction required of them.  This is always important with gobos that are based on words or logos.


Rule #4: Understand the Carrier
Many rotating gobos use a carrier that includes the gobo as well as the gears for rotation.  This makes it easy to change out the gobo, but you must consider how the gobo gets into the carrier.  With some fixtures the gobo will be glued into the carrier from the gobo manufacturer, while others such as the MAC Viper series will use a retaining ring along with the carrier.


Most carriers will have an orientation mark (or magnet) that ensures the carrier can be placed back into the wheel in the same orientation for each fixture (see A below).  You will want to also check that your gobos are all aligned with this marking within each carrier and inserted into the fixture with proper alignment; otherwise each gobo might be at a different angle within each fixture.

Gobos can create many dynamic and interesting looks on stage or in the air.  By shaping the light output, creative images are easy to achieve.  Ensure that you understand the methods for changing gobos on your fixtures.  Martin has a wide range of hard edge fixtures that make use of gobos, each with their own set of imagery.  Be sure to read the user manual for each fixture for specific gobo changing information.

Friday, April 14, 2017

Great New Creative Video Products from Martin!


Martin by Harman has just announced two new exciting creative video products.  The VDO Fatron 20 and VDO Dotron add more unique options to the VDO Sceptron line with many of the same features and qualities.


Both units can be controlled via the Martin P3 system or DMX 512.  They integrate well into video systems using the original VDO Sceptron or the VDO Face 5 panels.  Just like the Sceptron units, the VDO Fatron 20 and VDO Dotron have a multitude of different diffusers available for creative looks and varying applications.


The VDO Fatron 20 is a 20 mm pixel pitch outdoor-rated LED video batten that can be used for eye-candy, uplight, wall washing, and more.  It is fully color calibrated to ensure all Fatron units have color consistency and that they match other VDO products too.  Just like the Sceptron, the Fatron is available in two sizes: 1000 mm and 320 mm.


The VDO Dotron provides a new shape to the VDO family.  The rounded configuration of 16 pixels punctuates designs with blasts of color and imagery.  Each Dotron unit has various diffusers that easily screw on to change the look and output.  Color calibration, built-in effects, and various mounting options further the feature set of the Dotron.


Speaking of mounting options, a host of new mounts allow for easy combining of various VDO elements.  You can easily add Dotrons to any Sceptron or Fatron layout using the specialized brackets or any standard clamps. 


Martin has even developed custom flight cases for both the VDO Fatron 20 and VDO Dotron so taking the units on the road is simple.

Want to know more?  Here are some videos about the new VDO products:
 VDO Fatron 20: https://youtu.be/7Lu1lOdf-JQ


VDO Dotron: https://youtu.be/ntlmno8a8YQ


Thursday, February 16, 2017

Martin P3 DMX Control is Awesome!

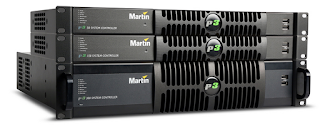
The Martin P3 processor is an amazing tool for controlling Martin creative video products such as the VDO Face 5, VDO Sceptron, and VDO Creative Pixels.  I have written about the benefits before on this blog.  A new feature adds incredible control possibilities when combined with a DMX lighting console.

In short, you can modify via DMX (or Art-Net) intensity, color, rotation and other parameters for each object within the P3 system.  Additional system-wide controls provide easy access to presets, global intensity, color temperature, and much more.  Any modifications then made via DMX override the video that is currently playing through the P3.  This allows designers to create exciting imagery directly from their lighting console.  In other words, the video elements become lighting elements or combination units that can do both video and lighting!

Once you have added fixtures to your P3 layout, click on the "DMX & Motion" button on the top bar of P3.  This will open the DMX & Motion screen.  On the left you will see a list of control types and on the right tabs for DMX, Art-Net, and K2.  To configure the DMX control you need to tell P3 what you want to control and with which DMX channels.  You can simply click and drag items from the left section to the right, but it is much easier to use the wizard.

Click on the wizard button on P3's top bar to open the "DMX Control Wizard".  You will be guided through several options to setup and configure your DMX control.  First you can select if you want to control fixtures together, individually, in groups or other options.


Next you select DMX or Art-Net input and then decide what type of control you want for each.


The next screen refers to the layout of the DMX channels and asks if you want the order to be grouped by parameters or by fixture.  I prefer fixture as it is easier to match up to default fixture libraries in most lighting consoles.
Finally, select the starting DMX address for your range and then click on "Create DMX Controls" to have P3 configure everything for you. 
 

Your DMX screen will now be filled with DMX addresses assigned to their appropriate function.  You can see the mapping of the DMX channel to a specific "Target" (fixture) and various other options for each channel.

Now just apply DMX or Art-Net to your P3 controller and you are ready to have fun from your lighting controller.

As mentioned earlier, you can also click and drag DMX options from the DMX screen.  In the screen below I have dragged over a couple of Global Controls.  These effect everything within the P3 layout.  If you right click on the "Current Value" field you will see the DMX protocol (or map) for that specific channel.  As you can see there are many options available via DMX control.

P3 processors provide an unprecedented amount of control and processing to the attached video devices.  By adding in DMX control from a lighting console, LDs are able to further modify and use video products with ease.  This ability provides additional creative possibilities not available with other systems.